Work vehicles cop a lot. Heavy loads, corrugated roads, constant vibration and salt air all take a toll on the steel and aluminium that hold a ute or truck together. Over time, that wear shows up as cracked trays, split welds, loose mounts and rust creeping out from joints.
Welding repairs for utes and trucks can often fix this kind of damage without replacing the whole component. Not every part is a good candidate for repair, though, and some components need more care and paperwork than others. This guide covers the most common repairs on work vehicles, what causes weld damage in the first place, how a repair is carried out, and what to know before you book one in.
Our welding services in Hervey Bay cover steel repairs, ute alterations and vehicle fabrication for tradies, owner-operators and commercial operators across the region.
What Are Welding Repairs for Utes, Trucks and Commercial Vehicles?
How Vehicle Welding Repairs Restore Damaged Metal Components
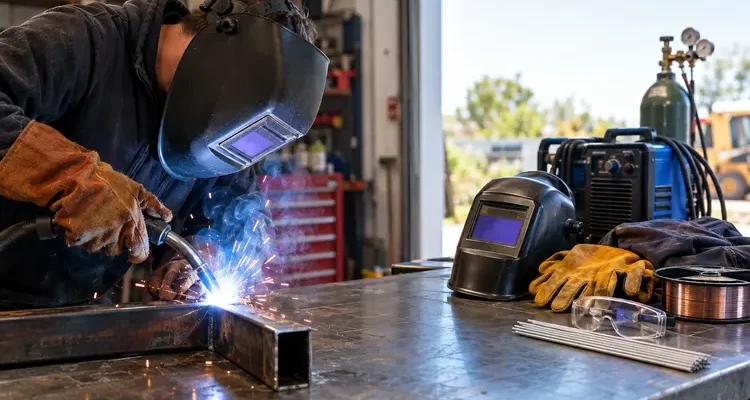
Vehicle welding repairs use heat and filler metal to fuse damaged material back together. The welder assesses the damage, prepares the metal, and lays a new weld that bonds both sides of the joint.
A well-executed repair can return a component to service with the strength it needs for its job. The result depends on the material, the condition of the surrounding metal and how the weld is done. Welding also changes the metal next to the joint. This area, called the heat-affected zone, can end up weaker than the original material, particularly on aluminium. A good repair is planned with that in mind rather than assuming the part will be “as new”.
Welding Repairs vs Custom Vehicle Fabrication
A repair fixes existing damage, such as a cracked tray rail, a failed joint or a broken mount. Vehicle fabrication means building something new or changing a component from its original design, such as adding a rack, extending a tray or making a custom toolbox mount.
Plenty of jobs involve both. A cracked tray might need the crack welded and a reinforcement plate fabricated and fitted at the same time. The distinction matters because changing the design of a structural component can bring in certification requirements that a straight repair may not.
When to Repair a Damaged Component Instead of Replacing It
The right call depends on the extent of the damage, the condition of the metal around it, and what the part does.
| Repair is usually worth considering when… | Replacement is usually the better option when… |
| The damage is localised to one area | Cracks or corrosion are spread across the component |
| The surrounding metal is sound and a reasonable thickness | The metal has thinned badly from rust |
| The part is non-structural or can be returned to its original design | The part is safety-critical and the manufacturer specifies replacement |
| A replacement part is hard to source or expensive | A new part costs less than the labour to repair it |
| The component has failed once from a known cause | The component has been repaired several times already |
A good welder will tell you honestly which side of that line your job falls on, including when replacement makes more sense.
Common Welding Repairs for Utes
Ute Tray Welding Repairs for Cracks, Splits and Damaged Tray Frames
Steel and aluminium trays take a lot of stress, especially when loads are heavy, uneven or regularly dropped onto the deck. Common spots for ute tray welding repairs include:
- corners and joins where the deck meets the side rails
- around drainage holes and cut-outs
- the tray frame and crossmembers underneath the deck
- mounting points where the tray bolts to the chassis
- headboard and tailgate mounts.
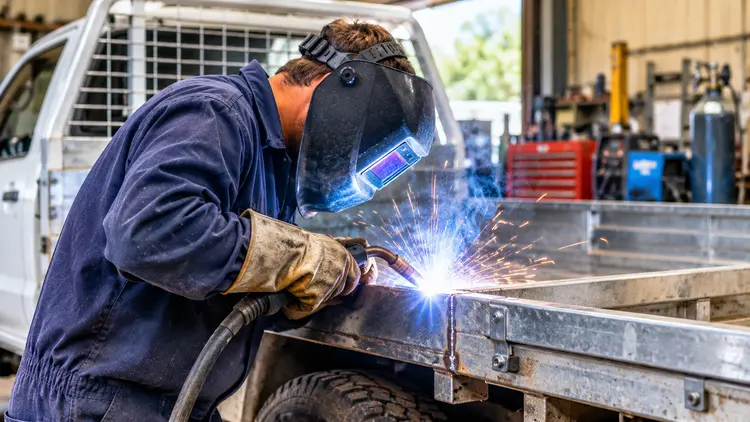
Ute tray welding repairs usually involve grinding out the crack, re-welding the joint and, where the crack has formed because of a recurring stress point, adding a gusset or reinforcement plate. If the tray frame has bent, it may need straightening before any welding is done.
Bull Bar, Tow Bar and Accessory Mount Repairs
Bull bars and tow bars carry real loads and take direct impacts, so damage around them is common on work utes. They’re also safety-critical, which limits what welding can fix.
Tow bars sold in Australia are rated components, built to meet Australian Design Rule 62 and the AS 4177 standard, and marked with towing and ball weight limits. Welding a cracked tow bar, tongue, receiver or rated mounting bracket compromises that rating. A damaged tow bar, or any part of its rated mounting assembly, should be replaced rather than re-welded.
Many bull bars on modern vehicles are designed to work with the vehicle’s airbag system, using mounting brackets engineered to deform in a set way during a crash. Welding a cracked airbag-compatible bracket changes how it behaves on impact, so these brackets should be replaced with the manufacturer’s replacement parts.
Welding is a reasonable fix for the non-safety-critical attachments around these bars, such as:
- light bar and spotlight tabs
- aerial and UHF radio mounts
- brackets for accessories like number plates or jerry can holders.
Ute Racks, Canopies, Toolboxes and Storage Mounts
Ladder racks, canopy frames and toolbox mounts tend to crack at their attachment points, mostly from vibration on rough or unsealed roads. These are generally straightforward repairs. They’re still worth doing early, before a mount lets go and drops a toolbox or rack onto the tray or the road.
Broken Brackets, Hinges and Other Steel Components
Tailgate hinges, drop-side brackets, latch mounts and spare wheel carriers are all common candidates for small weld repairs. If a bracket has snapped cleanly and the metal around it is in good condition, it can often be re-welded without fabricating new parts.
Welding Repairs for Trucks and Commercial Vehicles
Trucks and commercial vehicles work harder and carry more than most utes, so commercial vehicle welding often involves larger repairs and a closer look at how the damage started.
Truck and Cargo Body Repairs for Cracks and Impact Damage
Tray bodies, box bodies and cargo bodies tend to crack at stress points: door frames, body corners, crossmembers and the mounts that hold the body to the chassis. Impacts from forklifts, loading docks and pallets can split panels or crack the frame behind them.
Truck body welding often combines panel repairs with work on the structural frame underneath. Finishing also matters, because an unprotected repair is an easy starting point for rust.
Tipper Truck Body, Floor and Side Panel Repairs
Tipper bodies are some of the hardest-worked steel structures on the road. The floor takes repeated impact from loaded material, and the sides flex under load. Common repairs include:
- cracks along floor and side panel welds
- worn or split floor plates
- damaged tailgate hinges and latches
- cracking around hoist mounts and the body sub-frame.
These repairs usually involve grinding back to clean metal, welding the crack or joint, and sometimes adding wear plate to high-wear areas.
Tray Supports, Equipment Mounts, Steps and Guards
Crane mounts, hydraulic equipment brackets, access steps, mudguard brackets and guards are all welded or bolted to vehicle frames and bodies. Vibration and repeated loading are the usual causes of cracking here. Fixing a cracked mount early stops the damage spreading into the frame it’s attached to.
Trailer Frame, Floor, Gate and Rack Repairs
Trailers deal with heavy loads, road shock and loading impacts in all weather. Common welding repairs on trailers include cracked chassis rails, split floor plates, broken ramp and gate hinges, failed side rack welds and damaged drawbar mounts.
Drawbars and chassis rails are structural, and changes to their design may need to be certified before the trailer goes back on the road. Tow couplings shouldn’t be repaired by welding at all. Damaged couplings are replaced. This is covered in more detail further down.
Signs and Causes of Weld Damage on Work Vehicles
Catching damage early usually means a smaller, simpler repair. Signs worth acting on include:
- hairline cracks running through or alongside a weld
- paint cracking or flaking along a joint
- rust stains weeping from a seam
- mounts, brackets or tray sections sitting out of alignment
- new rattles, creaks or movement in a tray, rack or body.
Visible Cracks and Broken Welds
A crack often starts as a fine line that’s easy to miss under dirt or paint. Under repeated loading it grows, and the longer it’s left, the more material has to be ground out and replaced.
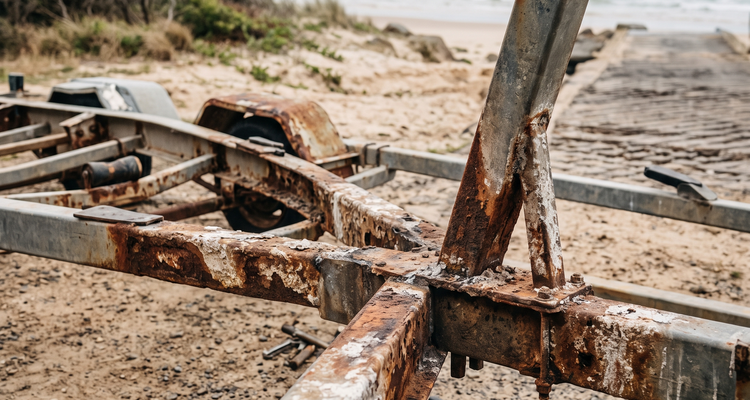
Rust and Thinning Metal Around Welded Joints
Rust often starts where two pieces of metal meet, which is exactly where welds sit. Surface rust can hide thinning metal underneath. Before welding, the welder needs to confirm there’s enough sound material left to hold a new weld. If there isn’t, a patch plate or a replacement section may be required.
Bent or Misaligned Mounting Points and Supports
A mount or bracket that’s sitting out of line may have a partly failed weld, even if the joint looks intact from the outside. Continuing to load a misaligned mount puts extra stress on the welds around it.
Heavy Loads, Vibration and Metal Fatigue
Metal fatigues under repeated stress cycles. Vehicles that carry heavy loads, run on unsealed roads or carry vibrating equipment will show fatigue cracking sooner than lighter-use vehicles. This isn’t necessarily a sign of poor workmanship. It’s what happens to metal under sustained working loads, and it’s manageable with regular checks.
Impact Damage from Loading and Equipment Handling
A single knock, such as a dropped load, a forklift tyne strike or a hard landing over a washout, can crack a weld or bend a mount. Impact damage isn’t always obvious straight away, so a quick look after any significant hit is worthwhile.
Corrosion from Coastal Conditions and Road Debris
Vehicles that live near the coast or regularly drive on beaches are more prone to corrosion. Salt, moisture and road grit collect in seams and around welds, especially under trays and inside chassis rails. Regular washing underneath, and treating chips and scratches promptly, slows this down considerably.
Poor Previous Repairs
Some failed welds are the result of an earlier repair that wasn’t done properly. Poor preparation, the wrong process or filler, or insufficient penetration can produce welding defects such as porosity, lack of fusion and undercut. These can look acceptable on the surface but give way under load. A repair that has cracked, bulged or separated usually needs to be ground out completely and redone.
Welding Processes Used for Vehicle Repairs
MIG, TIG and Stick Welding for Vehicle Work
Each process has its own welding terminology, but what matters to a vehicle owner is which process suits the job.
| Process | Typical vehicle use | Notes |
| MIG | Steel trays, bodies, brackets, trailer frames | Fast and versatile; the most common process for general vehicle repairs |
| TIG | Aluminium trays and canopies, thin sections, precise repairs | Slower, but offers fine heat control and a neat finish |
| Stick | Heavier steel sections, outdoor work | Handles wind and less-than-perfect surfaces better, but less suited to thin panels |
Welding Steel Versus Aluminium Components
Steel and aluminium need different equipment, filler metals and technique.
| Steel | Aluminium | |
| Common vehicle uses | Chassis, trays, bull bars, tow bars, tipper bodies | Trays, canopies, toolboxes, racks |
| Usual process | MIG or stick | TIG or MIG with an aluminium setup |
| Key challenges | Distortion, rust at the repair | Contamination, heat control, strength loss next to the weld |
| Preparation | Grind back to clean, bright metal | Thorough cleaning and oxide removal immediately before welding |
Aluminium is the one to be careful with. Many aluminium alloys used in trays and canopies lose a meaningful amount of strength in the heat-affected zone. Repairs need to be designed around that, often with reinforcement, rather than simply welding the crack closed.
The Vehicle Welding Repair Process
Step 1 — Inspecting the Damage and Confirming the Scope
The damaged area is cleaned and inspected to find the full length of the crack, check the condition of the surrounding metal and work out what caused the failure. What looks like one crack can be the visible end of a larger problem. This is also the point to confirm whether the job is a straightforward repair, involves a part that should be replaced rather than welded, or needs further checks before work starts.
Step 2 — Preparing the Metal and Removing Damaged Material
Preparation is where most repairs succeed or fail. The cracked material or failed weld is ground out to sound metal. Paint, rust, grease and road grime are removed from the weld zone, because contamination causes porosity and weak fusion. On longer cracks, a small hole may be drilled at each end to stop the crack running further.
When welding on the vehicle itself, a few precautions protect its electronics and reduce the risk of fire:
- disconnecting the battery, or using a surge protector designed for vehicle welding, and following the manufacturer’s procedure where one exists
- placing the earth clamp as close to the weld as possible, so welding current doesn’t travel through wheel bearings, gearboxes, sensors or wiring harnesses
- locating fuel lines, brake lines, hydraulic hoses and wiring that run along or inside chassis rails, and moving or shielding them from heat and spatter
- keeping fuel tanks and anything flammable well clear of the work area.
Modern utes and trucks carry several electronic control modules, and stray welding current can damage them, so these steps are part of the job rather than an optional extra.
Step 3 — Completing the Weld and Managing Distortion
The joint is welded using the process and filler suited to the material. Heat distortion is a real issue on trays, panels and long frame members. An experienced welder controls heat input and welds in a sequence that keeps the component straight.
Step 4 — Inspecting the Finished Weld and Surrounding Metal
The finished weld is checked for surface defects like porosity, undercut, incomplete fusion and cracking. The surrounding metal is checked for distortion or new stress marks. Structural components may need further inspection or certification, depending on the work.
Step 5 — Corrosion Protection and Finishing
Bare metal around a fresh weld starts to rust quickly, especially in coastal areas. The repaired area should be cleaned and coated with a suitable primer, cold galvanising paint or topcoat. On components exposed to weather and road spray, this step matters as much as the weld.
Structural and Safety-Critical Vehicle Repairs
The Risks of Incorrect Welding on Load-Bearing Components
A weld on a load-bearing component can look tidy and still fail. Poor penetration, the wrong filler or overheating can leave a joint much weaker than it appears. On a tray mount, that might mean a cracked tray. On a drawbar or chassis rail, the consequences can be far more serious for the driver and other road users.
Chassis, Steering, Suspension, Drawbars and Couplings
Chassis rails, suspension, steering, drawbars and couplings sit in a different category to trays and bodies, and some of them shouldn’t be welded at all.
Steering components and tow couplings should never be repaired by welding or heating, and suspension components only where the manufacturer permits it. Damaged steering parts and couplings are replaced.
Chassis welding needs particular caution. Many vehicle manufacturers publish body builder guidelines that limit where and how a chassis can be welded or drilled, and some prohibit welding on certain areas, such as the rail flanges or zones near suspension mounts. Many modern ute and truck chassis also use high-strength or heat-treated steels. Welding heat can permanently reduce the strength of these steels next to the weld, which can lead to cracking beside the repair rather than in it.
When a Repair Needs an Engineer or Approved Inspection
In Queensland, vehicle modifications are covered by the Department of Transport and Main Roads (TMR). Minor and basic modifications that keep a vehicle compliant with vehicle standards don’t need certification. Complex modifications must be inspected and certified by a TMR-accredited approved person, and some jobs also need an engineer’s design or sign-off.
A repair that simply restores a component to its original design is generally treated differently from a modification. If the work changes the design of a chassis, drawbar, coupling or suspension component, or adds structural reinforcement, it may need certification. Chassis rail repairs, particularly ones involving reinforcement plates, often fall into this territory. If you’re not sure which category a job falls into, check with TMR or an approved person before the welding starts, not after.
Why DIY Welding Isn’t Suitable for Every Repair
A capable home welder can handle plenty of non-structural jobs, like a toolbox bracket or a tailgate latch mount. Load-bearing and safety-critical vehicle repairs are a different matter. The risks of DIY welding on these components include welds that look sound but can’t take the load, hidden damage from overheating, and repairs that don’t meet vehicle standards. If a weld on a drawbar or chassis lets go at speed, the consequences reach well beyond the vehicle.
How to Reduce Future Vehicle Welding Repairs
Inspecting Trays, Bodies and Mounts After Heavy Loads or Impacts
A few minutes of checking after a heavy week or a hard knock can catch a crack while it’s still a small job. Things to look at include:
- tray corners, crossmembers and mounting points
- rack, canopy and toolbox mounts
- tow bar and bull bar brackets
- tipper floor and side welds
- trailer drawbar, coupling and spring hanger welds.
Distributing and Securing Loads Correctly
How a load sits on the tray affects how the vehicle’s steel wears. Concentrated loads put more stress on a small area of the deck and frame than loads spread across the tray. Loads that shift in transit also send sudden forces through mounts and tie-down points. Distributing weight evenly and securing loads correctly protects the vehicle’s welds as well as the cargo.
Treating Rust Before It Weakens Steel Components
Surface rust on a tray or body won’t cause a failure overnight, but left alone it thins the metal and weakens weld zones. Grinding back to clean metal, treating the area and recoating it adds years to steel components. A regular wash underneath the vehicle helps too, particularly for vehicles used near the coast.
How Much Do Welding Repairs for Utes and Trucks Cost?
What Affects the Cost of a Vehicle Welding Repair
There’s no standard price for vehicle welding repairs, because the work varies so much from job to job. The main factors are:
| Factor | How it affects the job |
| Size and extent of the damage | Longer cracks and multiple failure points take more time to prepare and weld |
| Material | Aluminium usually needs more preparation and specialised equipment than steel |
| Access | Joints under trays or behind bodies may need parts removed first |
| Fabrication | New plates, gussets or brackets add cutting and fitting time |
| Rust | Badly corroded areas may need cutting out and new material let in |
| Finishing | Priming and coating the repair adds time but protects the work |
| Certification | Structural modifications may involve inspection or engineering costs |
What to Include When Requesting a Welding Quote
The more detail you can provide upfront, the more accurate the quote will be. It helps to include:
- clear photos of the damage, including a wider shot showing where it is on the vehicle
- the vehicle make, model and year
- the tray or body material (steel or aluminium)
- what the component carries or does, including any towing or load ratings
- how the damage happened, if you know
- whether the area has been repaired before.
Vehicle Welding Repairs from CJS Machinery Hire
Ute Alterations, Tray Modifications, Racks, Bull Bars and Tow Bars
We help tradies and owner-operators set up their work vehicles properly. Our ute modifications and alterations cover custom racks, tray modifications, bull bars, tow bars and general vehicle fabrication. If you’re not sure what your vehicle needs, get in touch and we’ll talk it through.
General Steel Repairs and Commercial Welding
Beyond ute alterations, we take on small steel repair jobs, such as broken brackets, damaged frames and trailer repairs, along with commercial welding, structural steel work and fabrication. We work with both steel and stainless steel. If you’re after truck welding services or vehicle fabrication on the Fraser Coast, send through the details and we’ll let you know what’s involved.
More Than 50 Years of Combined Welding Experience
Our welders have more than 50 years of combined experience, covering everything from quick repairs to complex fabrication. That experience counts on vehicle work, where preparation and heat control make the difference between a lasting repair and a repeat job.
Serving Hervey Bay, Booral and the Fraser Coast
We’re based in Booral and work with tradies, owner-operators and commercial operators across Hervey Bay, Maryborough and the wider Fraser Coast.
Frequently Asked Questions
How Long Do Vehicle Welding Repairs Usually Take?
It depends on the job. A small bracket or hinge repair can be quick, while a tipper body with several cracked welds, rust removal and new plate can take considerably longer. Access, parts removal and corrosion protection all add time. Once the damage has been looked at, you’ll have a clearer idea of how long the vehicle will be off the road.
Is It Safe to Weld a Truck Chassis?
It depends on the vehicle and the repair. Many manufacturers restrict where and how a chassis can be welded, and many modern chassis use high-strength or heat-treated steels that welding heat can weaken. Some chassis repairs, especially those involving reinforcement, may also need an engineer’s input and certification by a TMR approved person. Chassis work should only be done in line with the manufacturer’s guidance, and if there’s any doubt, checked with an approved person before welding starts.
Can Aluminium Ute Trays Be Welded?
Yes. Aluminium trays can be welded with TIG or with MIG equipment set up for aluminium. The metal must be thoroughly cleaned, and heat has to be carefully controlled. Aluminium also loses some strength next to the weld, so cracked trays often need reinforcement as well as welding to stop the crack returning.
Can Rusted Steel Vehicle Components Be Repaired?
Often, yes, as long as there’s enough sound metal left. Surface rust can be ground back and the joint welded. Where corrosion has thinned the metal, a patch plate or a new section may need to be let in first. If the component is badly corroded throughout, or is safety-critical, replacement is usually the better choice.
How Much Do Ute and Truck Welding Repairs Cost?
Costs vary with the size of the damage, the material, access, and whether fabrication or certification is involved. The quickest way to get a realistic figure is to send through photos of the damage along with the vehicle details. That way the quote reflects your actual job rather than a guess.
Get Professional Welding Repairs for Your Vehicle
If your tray has a crack that’s been slowly growing, a rack mount has started to move, or a bracket has finally snapped, it’s worth having it looked at before it turns into a bigger repair.
Send us photos of the damage and your vehicle details, or give us a call. We’ll talk through what’s needed and give you a straightforward quote.
Ute and Truck Welding Repairs in Hervey Bay from a Local Welding Team
The skills that go into a solid tray or bracket repair are the same ones we use across the rest of our steel work. The preparation, heat control and finishing that keep a work vehicle on the road also apply to welding repairs for heavy equipment and welding repairs for agricultural equipment.
If your work vehicle needs attention, contact CJS Machinery Hire to book in a repair or ask for a quote.
Related Posts
Post a Comment