Got a cracked bracket, a broken gate hinge or a worn piece of equipment sitting in the shed? Picking up a welder and fixing it yourself can seem like the obvious move. You save on labour, you don’t have to wait for someone to fit you in, and you get the satisfaction of doing the job with your own hands.
The catch is that welding is a lot more than joining two pieces of metal together. It takes the right equipment, a working knowledge of the process, careful preparation and proper safety precautions. Get any of those wrong and the DIY welding risks start to stack up: burns, eye injuries, fires, hazardous fume exposure and welds that look fine but fail when they’re put to work.
That’s not to say every DIY job is a bad idea. If you’ve had suitable training, you have the right gear and a safe space to work in, there are plenty of low-risk practice projects where welding at home makes sense. The real question is whether the money you save outweighs the safety risks, the quality concerns and the chance of paying for the job twice.
For structural repairs, machinery components, load-bearing parts and anything else where weld quality really matters, professional welding services are often the safer and more cost-effective option. In this guide, we’ll walk through the main hazards, the hidden costs of a poor weld and how to decide which jobs you can tackle yourself and which are better left to a professional.
What Is DIY Welding and Why Is It So Popular?
Understanding the Basics of DIY Welding
Welding joins metal components using heat, pressure or a combination of both, depending on the process. Unlike bolting, riveting or other mechanical fastening methods, a weld fuses the metals themselves, creating a single joined piece rather than holding separate parts together.
That’s what makes welding so useful, and it’s also what makes it unforgiving. Once the metal is fused, the strength of the joint depends on how well the job was done. The right welding method depends on the type of material, its thickness, the joint design and what the finished component will be used for.
A thin sheet metal bracket, a heavy steel plate and an aluminium fitting each need a different approach. That’s why choosing the right welding equipment for the job is one of the first hurdles people run into once they start looking at buying a machine.
Common DIY Welding Projects
Most people who take up welding at home start with straightforward, low-stakes work, such as:
- Repairing garden tools, metal brackets and non-critical household items
- Building simple metal frames, workbenches and workshop accessories
- Fabricating decorative metalwork and garden features
- Repairing selected non-structural components where the material and intended use are understood
- Making minor repairs to workshop equipment that don’t affect safety-critical functions
These are reasonable places to start learning. The trouble begins when the confidence gained on a garden bed frame gets applied to a trailer, a machinery attachment or a structural repair.
Why People Choose to Weld Without Professional Help
The reasons are easy to understand:
- The perceived savings of avoiding labour costs
- Convenience when a repair looks small or straightforward
- Interest in learning a practical trade skill
- Easy access to entry-level welding machines and online tutorials
- The desire to customise metal components rather than buy replacements
For some jobs, those reasons stack up. The problem is that people tend to judge a job by how simple it looks, rather than by what the finished component needs to do.
When a Simple-Looking Welding Job Is More Complicated Than It Appears
A small crack isn’t always just a small crack. It can be a sign of metal fatigue, a material problem or a design issue that a quick surface repair won’t fix. Weld over a crack without understanding why it formed, and there’s a good chance it will come back.
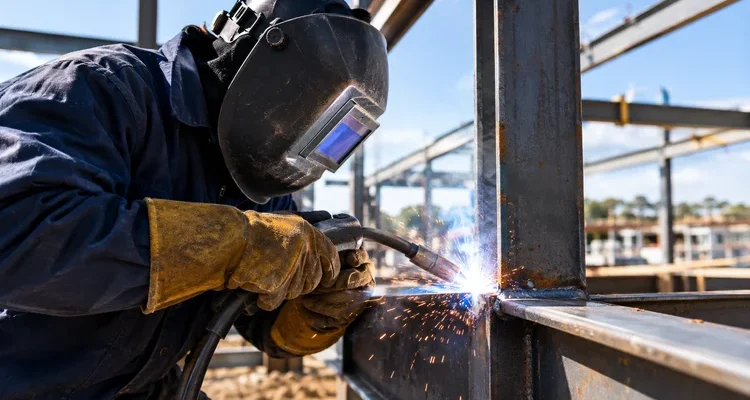
Metal thickness, joint preparation and machine settings all affect the finished result in ways that aren’t obvious to the eye. And this is where many welding defects and failures begin: a weld can look neat on the surface while hiding porosity, incomplete fusion or poor penetration underneath.
Put simply, a component can look repaired and still be unsafe once it’s under load or vibration.
The Biggest Risks of DIY Welding
Every welding job carries hazards, but DIY welding risks are often greater because home setups tend to lack the controls, equipment and experience found in a professional workshop. DIY welding hazards also tend to be underestimated on small jobs, simply because they don’t feel risky. Here are the main risks to be aware of.
Burns and Heat-Related Injuries
Welding produces molten metal, sparks, spatter and workpieces that stay hot long after the arc stops. Burns can come from spatter landing on skin or clothing, from contact with the weld pool, or from picking up metal before it has had enough time to cool. Hot metal often looks exactly the same as cold metal.
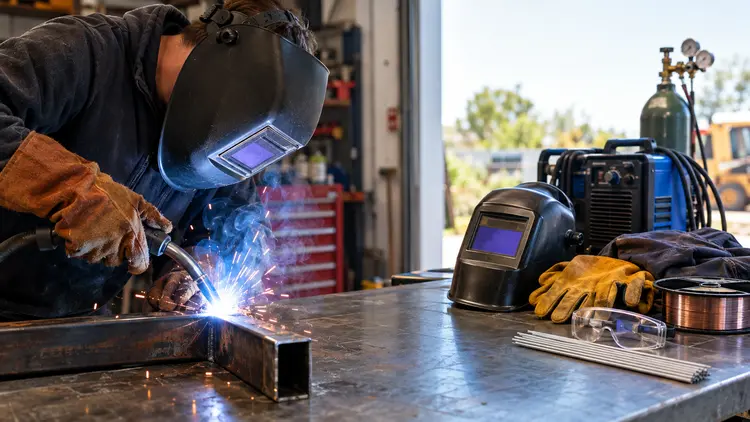
Even a quick tack weld or a short repair can throw dangerous heat and flying particles well beyond the work area. Welding gloves, flame-resistant protective clothing, suitable footwear and safe work habits are essential for every job, no matter how small.
Eye Injuries and Arc Flash
A welding arc gives off intense ultraviolet and infrared radiation. Looking at the arc without proper protection, even briefly, can cause arc eye, a painful inflammation of the eye’s surface. Symptoms often don’t show up until several hours later, which is why people are sometimes caught off guard. Exposed skin can also suffer radiation burns, similar to severe sunburn.
You’ll need a welding helmet with the correct filter shade for the process and current you’re using. Regular safety glasses don’t provide adequate protection from the arc. Welding screens help protect anyone nearby, because bystanders who glance at the arc without protection are at risk too.
Electric Shock and Electrical Hazards
Welding machines use electrical currents that can cause serious injury. Damaged cables, worn insulation, faulty equipment, unsuitable power supplies and poor electrical practices all increase the risk of electric shock. Wet conditions make things considerably worse, which is worth remembering in a Queensland summer when humidity, sweat and afternoon storms are part of the picture.
Before every job, check your leads, cables, connections and machine for damage, and follow the manufacturer’s instructions for setup and operation. Electrical faults can also start fires, so problems shouldn’t be ignored or worked around.
Any electrical installation or repair work, such as adding a new power outlet for your welder, should be left to a licensed electrician.
Fire and Explosion Hazards
Sparks and molten metal can travel several metres from where you’re welding. Timber, cardboard, dry grass, fuel, solvents, oily rags, gas cylinders and flammable coatings can all ignite. In a typical shed or garage, there’s usually something combustible within range.
Welding or cutting tanks, drums or containers that have held fuel, solvents or other flammable substances is especially dangerous. Vapours and residues can remain inside long after a container looks empty, and the heat from welding can ignite them without warning. Containers like these need to be properly cleaned, purged and checked by someone who knows the process before any hot work begins.
Good hot work practice includes clearing the area, having fire safety equipment ready and checking the area after you finish, because smouldering material can flare up well after the welding has stopped.
Exposure to Hazardous Welding Fumes
Welding fumes and hazards vary depending on the process, the base metal, the filler material and any coatings on the surface. Welding painted, galvanised, contaminated or otherwise coated metal can release particularly harmful fumes. Galvanised steel, for example, can cause metal fume fever, while welding stainless steel can produce fumes containing hexavalent chromium.
Working outdoors helps, but it doesn’t remove the risk. Fumes can still collect in your breathing zone, especially on still days, when you’re leaning over the work or when you’re welding in a partly enclosed space.
The welding health risks are serious. Safe Work Australia recognises welding fumes as a cause of cancer, and exposure is also associated with lung disease and other short- and long-term health effects. Suitable ventilation, fume extraction at the source and respiratory protection, chosen based on a proper risk assessment, are important controls rather than optional extras.
Noise, Flying Particles and Workshop Hazards
The welding itself is only part of the job. Grinding, cutting and preparation work bring their own hazards, including noise loud enough to damage your hearing over time, metal fragments and grinding debris that can injure your eyes, and sharp edges on cut material.
Leads, hoses, tools and offcuts scattered across the floor are trip hazards. A cluttered workspace makes injuries and equipment damage more likely.
Injuries to Other People Nearby
Home workshops are rarely set up with other people in mind. Family members, kids, pets, employees or customers sharing the space can be exposed to arc radiation, sparks and fumes if there’s no separation.
Barriers, a designated work area and restricted access all matter. Sparks can travel further than most people expect, and a garage or carport that doubles as a living or storage area may not provide enough separation from everyday activity.
The Hidden Risks of Poor-Quality DIY Welds
Why a Weld Can Look Strong but Still Fail
A good-looking weld bead and a structurally sound joint aren’t the same thing. Some of the most common welding defects include:
| Defect | What it is | Why it matters |
| Porosity | Gas pockets trapped in the weld | Weakens the joint and can lead to cracking |
| Cracks | Fractures in or around the weld | Can grow under load until the joint fails |
| Incomplete fusion | Weld metal not properly bonded to the base metal | The joint may separate under stress |
| Lack of penetration | Weld not reaching through the full joint | Reduces the joint’s load-bearing capacity |
Contamination, incorrect settings, poor joint preparation and inconsistent technique can all cause these problems. Once you understand common welding defects and inspection terminology, it becomes clear how many things can go wrong without leaving obvious signs on the surface. A visual check alone often can’t tell you whether a weld is fit for its intended purpose.
Structural Failure Under Load or Pressure
When a weld fails, a component can separate, bend or collapse. A cracked decorative bracket is an inconvenience. A failed weld on a component that supports weight, transfers force or operates under pressure can cause injury or serious damage.
Machinery attachments, lifting equipment, trailers and structural steelwork all fall into this category. If you’re working on a shed frame, carport, mezzanine or similar build, there are structural welding requirements for construction projects to consider, including the design, the grade of steel and how the work will be checked.
Safety-critical components need appropriate design, suitable welding procedures and proper inspection. They’re not the place for trial and error.
Vibration, Fatigue and Repeated Stress
Repeated movement and vibration can cause fatigue cracking, even in a weld that held up perfectly well under a single test. Machinery frames, vehicle components and equipment that gets used every day are constantly being loaded and unloaded, and a weld that isn’t suited to those conditions can crack over time.
That’s why these components often need more than a basic surface repair. Understanding the forces acting on the joint, including their direction, size and how often they occur, is essential to a repair that lasts.
Corrosion and Premature Weld Failure
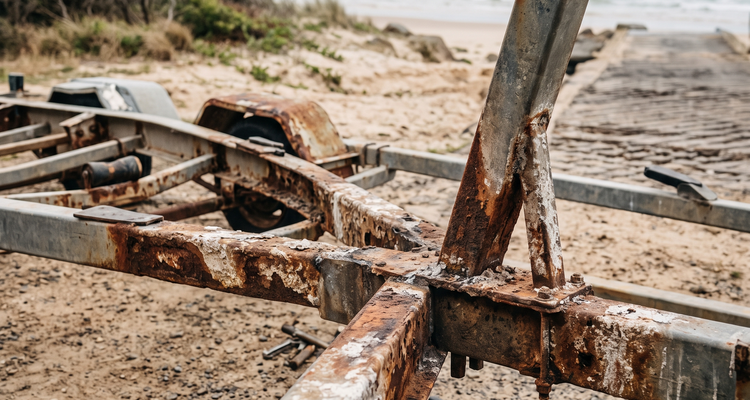
Rust, mill scale, paint, oil and other contamination can seriously compromise weld quality. Welding over a corroded area without proper preparation can produce a joint that looks sound while the underlying corrosion keeps working away.
An unsuitable repair may also leave the original problem unresolved. Proper cleaning, an assessment of the remaining material and post-weld protection such as priming or painting, where required, are all part of a repair that stands up to the elements.
The Cost of Getting a DIY Weld Wrong
When a DIY weld fails, the costs can add up quickly:
| Cost | What it can include |
| Materials and consumables | Replacement metal, wire, electrodes and shielding gas |
| Extra equipment | Grinders, clamps, cutting tools and replacement parts |
| Rework | Time spent finding the defect, removing the failed weld and starting again |
| Component damage | Distortion or heat damage to the surrounding metal |
| Downtime | Equipment out of action while it’s being repaired again |
| Injury and liability | Costs if a failed repair hurts someone or damages property |
This is especially true for machinery welding repairs. Looking at common welding repairs for heavy machinery and equipment shows how often worn or damaged components need more than a quick fix. The lowest upfront cost doesn’t always mean the lowest overall cost.
DIY Welding vs Professional Welding Services
Comparing the True Cost of DIY Welding
When comparing DIY welding vs professional welding, it’s worth adding up everything the DIY option really involves:
- Buying a suitable welding machine and accessories
- Welding consumables, filler materials and replacement parts
- Personal protective equipment and ventilation
- Preparation, cutting, grinding and finishing tools
- Training time, practice materials and potential rework
- The value of your own time spent completing and checking the repair
For a one-off repair on a non-critical item, DIY might still come out ahead. But once you add training, gear and the chance of doing it twice, the gap between DIY and the cost of professional welding is often smaller than it first appears.
What Professional Welding Services Can Offer
A professional welder will typically provide:
- An assessment of the material, the damage and how the component is used
- Selection of an appropriate welding process and consumables
- Proper preparation and joint fit-up
- Controlled welding techniques suited to the job
- Identification of defects and appropriate inspection
- Advice on whether a component should be repaired, reinforced or replaced
- A more suitable approach for complex, safety-critical or heavy-use applications
This applies to everything from small metal welding repairs around the property to larger jobs on working equipment. That last point about repair versus replacement can save you money on its own. There’s little value in paying for a repair on a part that has reached the end of its working life.
When Professional Welding Is More Cost-Effective
Professional welding generally offers better value when:
- The repair involves expensive machinery or equipment
- Downtime affects your business, farm or project
- The consequences of a failed weld are significant
- The job calls for specialised materials, joint designs or welding processes
- Repeated DIY attempts haven’t produced a reliable result
- The work needs testing, inspection or documentation
Does Hiring a Professional Guarantee a Perfect Weld?
Hiring a professional reduces the avoidable risks, but no repair is completely free of the chance of future problems. The welder’s experience, qualifications, procedures and quality checks all play a part in the outcome.
You can help by explaining what the component does, the loads it carries and the conditions it operates in before any work starts. It’s also worth knowing that not every repair needs the same level of testing or certification. The right level of inspection depends on what the component does and any requirements that apply to it.
Which DIY Welding Jobs Are Suitable for Beginners?
Low-Risk Projects for Learning Welding Skills
DIY welding safety starts with choosing the right projects. Good options for learning include:
- Practice welds on clean scrap metal of a known type and thickness
- Small decorative projects that don’t support loads or perform safety-critical functions
- Simple workshop organisers and non-critical metal fixtures
- Practice joints you can cut apart, inspect and throw away if the result isn’t right
Jobs Beginners Should Avoid
Some jobs aren’t suitable for inexperienced operators, however simple they look:
- Load-bearing structural components
- Vehicle chassis, steering, suspension and other safety-critical vehicle parts
- Lifting points, lifting attachments, pressure vessels and pressurised pipework
- Components that support people or prevent falls, such as ladders, platforms and handrails
- Critical machinery components where failure could cause injury, equipment damage or downtime
- Containers that have held fuel, solvents or other hazardous substances
- Repairs requiring specialised welding procedures, material traceability or formal inspection
Why You Should Not Learn on Equipment You Depend On
It’s tempting to learn on the job that needs doing, but valuable machinery and equipment you use regularly are poor choices for early practice. The biggest issue is that it’s very hard for a beginner to tell whether their repair is actually safe. Often the first real test is when the component fails.
Build your skills on practice material first, then progress to more complex work as your experience grows. And if a component is badly worn or damaged, replacing it may be a better option than an uncertain repair.
How to Recognise When a Job Is Beyond Your Skill Level
It’s time to step back if:
- The metal type or grade is unknown
- The component has cracked repeatedly or is badly bent or distorted
- The repair affects structural strength or safe operation
- The joint is hard to reach or prepare properly
- The work has to be done overhead, at height or in a confined space
- You can’t confidently identify the hazards or put the right controls in place
- The finished weld needs to meet an engineering standard or pass an inspection
What Do You Need to Weld Safely?
The Right Welding Machine and Consumables
Each common welding process has its own strengths:
| Process | Typical uses | Things to know |
| MIG | General fabrication, sheet metal, workshop projects | Generally easier for beginners to pick up; shielding gas can be affected by wind outdoors |
| TIG | Thin materials, stainless steel, aluminium, precise work | Gives fine control but takes more skill and practice |
| Stick | Outdoor repairs, thicker steel, rusty or less-than-clean surfaces | Handles site conditions well but produces more slag and spatter |
Knowing the differences between MIG, TIG and stick welding is a good starting point, but the material type, thickness, joint design and working conditions all affect which process suits the job.
A machine’s advertised capabilities don’t make it suitable for every task. Filler wire, electrodes and shielding gas need to be compatible with the material, and the manufacturer’s instructions should always be followed. Mismatched consumables and incorrect settings are behind a lot of poor-quality welds.
Personal Protective Equipment for Welding
If you’re wondering what safety equipment you need for welding, the basics include:
- A welding helmet with the correct filter shade for the process and current
- Safety glasses for preparation, grinding and other associated work
- Welding gloves and flame-resistant protective clothing that covers exposed skin
- Sturdy, suitable footwear
- Hearing protection where grinding, cutting or other noisy work is involved
- Respiratory protection when your risk assessment indicates it’s needed, selected for the specific hazard
PPE should work alongside good ventilation, fire prevention and other controls, not replace them. A respirator, for example, isn’t a substitute for proper fume extraction when extraction is practical.
Setting Up a Safe Welding Workspace
Good welding safety precautions start before you strike an arc:
- Choose a dry, well-ventilated work area
- Remove combustible materials and check for nearby fire hazards
- Use welding screens and keep other people out of the work zone
- Inspect cables, leads, connections and equipment before use
- Make sure the workpiece is stable and securely clamped
- Set up suitable fume extraction or ventilation
- Keep a fire extinguisher within reach and make sure everyone knows what to do in an emergency
Why Training and Preparation Matter More Than Buying Expensive Equipment
An expensive welder won’t make up for poor technique or a lack of hazard awareness. Knowing how to set up the machine for the material, prepare the joint properly and recognise a bad weld is what makes the difference.
Practical instruction and supervised training are well worth the investment before you attempt unfamiliar work. Just as importantly, be honest with yourself about the limits of your experience.
When DIY Welding Is Not Worth the Risk
Some jobs make the answer clear. Farm equipment is a good example. Implements, hitches, frames and attachment points cop constant vibration, heavy loads and tough conditions, and many properties around the Fraser Coast rely on them to keep working through busy periods. A weld that holds for a day can still develop into a fatigue crack a few weeks later, often at the worst possible time. Welding repairs for agricultural machinery need to account for those forces, not just fill the gap.
The same goes for trailers, tipper bodies, hoists and other equipment that carries loads over and over again. When that equipment is central to how you earn a living, a failed DIY repair can cost far more than the repair itself.
How to Decide Whether to DIY or Hire a Professional Welder
Consider the Purpose of the Component
Start with the most important question: what does this part actually do?
- Is it decorative, or does it carry a load?
- Will it support people, machinery or moving equipment?
- Could failure damage property or cause injury?
- Does it need to meet a specific engineering or industry standard?
If you answer yes to any of these, a professional is likely worth the cost.
Assess the Complexity of the Repair
- Is the material known and suitable for the welding process you intend to use?
- Can the joint be properly accessed, cleaned and prepared?
- Does the component require specialised equipment or techniques?
- Is there evidence of cracking, fatigue or previous failed repairs?
Repeated cracking and failed earlier repairs deserve particular attention, because they usually mean the visible damage is a symptom of a bigger problem.
Calculate the Full Cost of Both Options
Compare the cost of equipment, consumables, safety gear and your own time against a professional quote. Then factor in the cost of potential rework, replacement parts and downtime, along with any inspection or documentation the repair needs.
Finally, think about what happens if the weld fails. For a garden ornament, not much. For a machinery attachment or a trailer, the financial and safety consequences can be serious.
When to Hire a Professional Welder
A professional is the better choice when the repair involves structural damage, safety-critical components, unknown materials, repeated cracking or work beyond your current skill level. Heavy equipment is a common example. Welding repairs for earthmoving equipment, such as buckets, booms, pivot points and frames, involve high loads and constant stress, so a failed repair can quickly lead to downtime and further damage.
Make the Decision Based on Risk, Not Just Price
A low-cost DIY repair can be a sensible choice for a simple, non-critical practice project. It’s a poor choice for an essential component. If you’re unsure what would happen if the weld failed, that uncertainty is a good reason to get professional advice first.
When you compare welding services in Queensland or anywhere else, the goal is the same: choose the repair method that suits what the job actually needs, not simply the cheapest or quickest option.
Why Choose CJS Machinery Hire for Welding Services?
Professional Help for Welding Jobs That Need the Right Approach
If your project has outgrown your experience, your equipment or your workshop, our team at CJS Machinery Hire can help. We’re a family-owned business based in Booral, Hervey Bay, with over 25 years’ experience in construction and earthmoving, and we know how much it matters when equipment needs to keep working.
Every welding job is different, so we take the time to understand the component, the material, the damage and how the item is used before recommending an approach. Sometimes that means a repair, sometimes reinforcement, and sometimes the honest advice is that replacement makes more sense.
When to Contact CJS Machinery Hire Instead of Attempting a DIY Repair
Get in touch with us when:
- A repair affects the reliability or safe operation of equipment
- A weld has failed before, or the cause of the damage is unclear
- The job requires more precision or experience than you have
- An unsuccessful repair could lead to costly downtime or further damage
- You’d like advice on whether a proposed welding repair is suitable
What Information to Prepare Before Requesting a Welding Quote
Having these details ready helps us give you a more accurate quote:
| Information | What to include |
| Item description | What the component is and what it does |
| Material type | If known |
| Photos | The damaged area and the whole component |
| How it’s used | Loads, vibration, working conditions and how often it’s used |
| Repair history | Any previous repair attempts or recurring faults |
| Measurements | Relevant dimensions, drawings or specifications, where available |
| Timing | Your timeframe and any operational constraints |
Contact CJS Machinery Hire About Your Welding Project
Choosing the right repair approach before you start can save you time, money and a lot of frustration. If you’re not sure whether your job is one to tackle yourself, have a chat with our team about our welding services and what your project involves.
Frequently Asked Questions About DIY Welding
Is DIY Welding Safe for Beginners?
Beginners can learn to weld safely, but they should start with proper training, appropriate safety controls and non-critical practice projects. Some jobs, such as load-bearing parts, safety-critical machinery components and containers that have held flammable substances, aren’t suitable for inexperienced operators regardless of how simple they look.
Is It Cheaper to Weld Something Yourself or Hire a Professional?
DIY welding can save on labour costs for suitable projects, but you also need to account for equipment, consumables, PPE, training and possible rework. When reliability and safety matter, professional welding often offers better overall value once the cost of a failed repair is considered.
What Are the Dangers of DIY Welding?
The main dangers include burns, eye injuries from arc radiation, electric shock, fire, hazardous fume exposure and weld failure. Which risk is most significant depends on the job, the materials, the working environment and your level of experience.
Can a DIY Weld Be as Strong as a Professional Weld?
Weld strength depends on the material, joint design, preparation, welding procedure and execution. A skilled and experienced operator can produce a strong weld, but a weld’s appearance alone doesn’t prove its strength or suitability for the job.
Can You Weld Structural Steel Yourself?
Structural welding requires an understanding of the design, materials, procedures and applicable requirements. In Australia, structural steel welding is generally carried out to the AS/NZS 1554 series of standards, which covers matters such as weld procedures, welder qualification and inspection. If the work is structural or safety-critical, engage a suitably qualified professional.
Do You Need Qualifications to Weld in Australia?
It depends on the work, the industry, the workplace and the standards or regulations that apply. General hobby welding at home is different from specialised work that requires demonstrated competency, approved procedures or specific qualifications. Safe Work Australia and your state’s work health and safety regulator publish guidance that can help you understand the obligations for your situation.
What Safety Equipment Do You Need for Welding?
At a minimum, you’ll need a welding helmet with the correct filter shade, welding gloves, flame-resistant clothing and suitable footwear. Safety glasses and hearing protection are needed for grinding and cutting, and respiratory protection may be required depending on the fumes involved. Ventilation and fire prevention measures are just as important as PPE.
Which Welding Jobs Should Be Left to Professionals?
Structural components, lifting equipment, trailers, vehicle chassis and suspension, pressure vessels, critical machinery parts and containers that have held fuel or chemicals are best left to professionals. So is any repair that needs to meet a specific standard or pass an inspection.
When Should You Call a Professional Welder?
Call a professional when you see structural damage, when the component is safety-critical, when the material is unknown, when cracks keep coming back or when the repair is beyond your skill level. If a failed weld would be costly or dangerous, getting professional advice first is the smarter move.
Not Sure If Your Welding Job Is Worth the Risk? Talk to CJS Machinery Hire
DIY welding has its place. Practice pieces, garden projects and simple workshop builds are great ways to build your skills. But when a repair carries real weight, keeps your equipment running or protects the people around it, the DIY welding risks usually outweigh the savings.
If you’re weighing up whether to tackle a job yourself, our team is happy to talk it through and give you honest advice on the best approach. Get in touch with CJS Machinery Hire today to discuss your project and find out how our professional welding services can help you get the job done safely and properly.
Related Posts
Post a Comment